
- Products
- Catalogs
- News & Trends
- Exhibitions
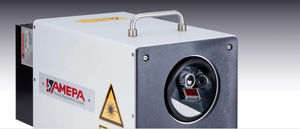
Vibration measuring system SRM 100roughnesslasersheet metal

Add to favorites
Compare this product
Characteristics
- Measured physical value
- vibration, roughness
- Technology
- laser
- Measured material
- sheet metal
- Applications
- for the automotive industry
- Configuration
- online
- Other characteristics
- ultra-high accuracy
Description
AMEPA online measurements of the surface area profile provide fundamental advantages for the customer:
Visualize and document the roughness over the entire length of the coil or strip
Efficiently detect roughness values outside the tolerance, which can be caused by
Incoming roughness of the raw material
Wear of work rollers
Incorrect process parameters
Provide online data to determine the optimal time to change the work rolls
Provide the roughness value of Ra as an input for the process control
Reduce the number of offline measurements with stylus instruments
The Benefits
Precise
Measuring range of Ra 0.3 to 3 µm,
RPc 30 to 120 cm-1,
resolution for Ra with 0.01 µm
For automotive grades with high accuracy at ± 10 % for tactile measurement
Measuring frequency up to 100 Hz, short response times, high dynamics
Ra measurements with selectable cut-off of 0.8 or 2.5 mm
View field of 1.2 х 0.4 mm,
measuring line of 1200 х 3.5 µm
(≈ spatial resolution like a stylus tip)
Efficient
Insensitive to vibrations and strip oscillations, measurement capability up to 2000 m/minute and higher strip speed
Reduction of time-consuming and sample-intensive stylus measurements, while maintaining the very high correlation with the stylus measurement
Measuring is possible regardless of lighting conditions and also possible when the strip is stationary
Informative
Documentation of measurement data of relevant roughness parameters with image evidence from the beginning to the end of the coil
Microscopic image of the surface structure
Validation unit for measurement integrity and measurement equipment capability studies
Versatile
VIDEO
Related Searches
- Measuring machine
- Laser measurement system
- Surface measuring machine
- Industrial profiler
- Measuring system for the automotive industry
- Online measuring system
- Roughness measuring machine
- Non-contact profiler
- Automatic surface measuring machine
- Laser profiler
- Portable profiler
- Sheet material measurement system
- Vibration measurement system
- Profiler for the automotive industry
- Sheet metal measuring machine
- Production line profiler
- In-line profilometer
- Direct-contact profilometer
*Prices are pre-tax. They exclude delivery charges and customs duties and do not include additional charges for installation or activation options. Prices are indicative only and may vary by country, with changes to the cost of raw materials and exchange rates.


