- Metrology - Laboratory
- Metrology and Test Equipment
- Benchtop hardness tester
- HELMUT FISCHER SRL
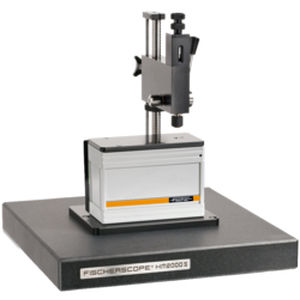
Benchtop indentation hardness tester FISCHERSCOPE HM2000 Scost-effective
Add to favorites
Compare this product
Characteristics
- Mounting
- benchtop
- Other characteristics
- cost-effective
Description
Simply place the sample and start measuring
A precise measuring device doesn’t have to be complicated. The FISCHERSCOPE® HM2000 S nanoindentation system proves that. This cost-effective, entry-level device from Fischer allows you to quickly and easily check the mechanical and elastic properties of surface layers, usually without any sample preparation at all. Simply place the sample on the measuring head, clamp down the support stand, and you’re ready to go.
Instrumented indentation testing determines parameters such as the Martens and Vickers hardness, elasticity and creep behavior of various types of surface treatments. The HM2000 S is finds application in a variety of industries, e.g. in paint production or electroplating.
We believe in developing long-lasting and flexible devices: If your measurement technology requirements change, the entry-level model can be upgraded to the automated HM2000.
Features
• - Determination of Martens and Vickers hardness, elasticity and creep behavior according to DIN EN ISO 14577-1 Annex A and ASTM E 2546
• - Dynamic measurement mode for the determination of additional elasticity parameters such as storage and loss moduli (dynamic mechanical analysis)
• - Determination of parameters, e.g. depth-dependent indentation hardness with ESP (Enhanced Stiffness Procedure)
• - Suitable for testing solid materials and coatings > 1 µm, test-force range 0.1 – 2000 mN
• - Indenter shapes: Vickers, Berkovich, carbide ball, Knoop or customized indenters
• - Thermally stable: Can measure at constant temperatures for several hours
• - Powerful WIN-HCU software for intuitive operation and evaluation
Catalogs
No catalogs are available for this product.
See all of HELMUT FISCHER SRL‘s catalogsOther HELMUT FISCHER SRL products
Measuring devices for nanoindentation
Related Searches
- Measuring device
- Measuring machine
- Indentation hardness tester
- Benchtop indentation hardness tester
- Digital measuring device
- Thickness measuring machine
- Vickers indentation hardness tester
- Optical measuring machine
- Automatic measuring machine
- High-precision measuring machine
- Measuring system for industrial applications
- Parts measuring machine
- Automatic measuring device
- Coating thickness gauge
- Control measuring machine
- Digital display thickness gauge
- Surface measuring machine
- Laboratory measuring machine
- Handheld thickness gauge
- Compact measuring machine
*Prices are pre-tax. They exclude delivery charges and customs duties and do not include additional charges for installation or activation options. Prices are indicative only and may vary by country, with changes to the cost of raw materials and exchange rates.


