- Electricity - Electronics
- Power Supply
- AC/DC power supply
- Hyrite Lighting Co.
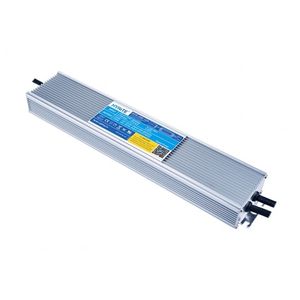
AC/DC power supply SPS seriessingle-outputdual-outputswitching
Add to favorites
Compare this product
Characteristics
- Type
- AC/DC
- Output
- single-output, dual-output
- Technology
- switching
- Protection
- with short-circuit protection, with overcurrent protection, with overload protection, with overheating protection
- Mounting
- wall-mount
- Certifications
- ISO
- Applications
- for industrial applications, for LED lighting
- Other characteristics
- stand-alone
- Input voltage
Min.: 100 V
Max.: 132 V
- Output voltage
12 V
- Current
3.3 A, 5 A, 7.5 A
- Power
40 W, 60 W, 90 W
Description
• Self-contained slim design, wiring connection inside
• UL recognized outdoor class 2
• IP64 rating
• For applications of
LED Signage
LED Architectural Lighting
LED Sports Lighting
LED Cobra Head Lighting
Features
-UL1310,Class 2 compliant;
-Constant voltage output;
-For outdoor or indoor applications;
-Suitable for installing in a wiring raceway;
-Ambient temperature:-25~+40
Installation Guide
Typical Installation
Supplies required:
Step 1 :Assemble the back plates with the liquid tight fittings, put the PLTC cable through and make the connections accordingly.MAKE SURE that the AC and DC cables are connected to their respective terminals.Use screws to mount the back plates to the case. Tighten up thescrews and the fittings to prevent leaking.(Fig3)
Step 2:Put the LED Power Supply into the raceway and mount with screws. (Fig.4)
c.Installation without junction boxes for indoor use: Follow Step 1 in “Installation in a raceway” and mount with screws.
d. Installation with junction boxes for indoor use:
Step 1: Mount the junction box on the wall with screws.
Step 2: Assemble the back plates with the liquid tight fittings, pull the AC input cable through.AC the DC output side, put the PLTC cablethrough and make the connections accordingly. Use screwsto mount both back plates to the case. Put the AC side fitting into the knock-out hole of the junction box, Tighten up the screws and the fittings to prevent leaking and mount the DC power supply to thejunction box.
Step 3: Mount the DC power supply to the wall using the back plate at the DC output side with screws .
Catalogs
No catalogs are available for this product.
See all of Hyrite Lighting Co.‘s catalogsRelated Searches
- Power supply
- AC/DC power supply
- CE power supply
- Single-output power supply
- SMPS power supply
- Power supply for industrial applications
- Power supply with overload protection
- Compact power supply
- Adjustable power supply
- Multiple-output power supply
- TUV power supply
- Built-in power supply
- High-performance power supply
- ISO power supply
- Wall-mount power supply
- Dual-output power supply
- LED lighting power supply
- Constant-current power supply
- IP67 power supply
- Low-voltage power supply
*Prices are pre-tax. They exclude delivery charges and customs duties and do not include additional charges for installation or activation options. Prices are indicative only and may vary by country, with changes to the cost of raw materials and exchange rates.


