- Products
- Surface inspection optical system
- JENOPTIK Industrial Metrology Germany GmbH
- Products
- Catalogs
- News & Trends
- Exhibitions
Surface inspection optical system Visionline IPS B100
Add to favorites
Compare this product
Characteristics
- Options
- surface inspection
Description
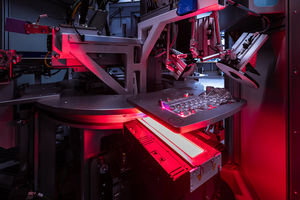
The IPS B100 internal test sensor enables automatic inspection of the internal surfaces of cylinder bores with a 360° view of the bore hole. The CMOS sensor, which is inserted into the bore, scans the entire internal surface, generating high-resolution and high-contrast images. This allows you to detect flaws such as blowholes, porosities and scratches in your workpieces even during production.
This process requires no rotational movement, which means very fast image acquisition times. Our system software provides fully automatic evaluation of the images of the internal bore surface. The software is easy to understand and intuitive to use. Your employees do not require any prior experience. The IPS B100 means an end to expensive visual inspections. The inspection results are also user-independent and objective. At the same time, the internal test sensor allows complex classifications of the surface flaws; for example, porosities can be evaluated according to indicators such as size, number and frequency. You can specify the quality level at which components are rejected as NOK. The system automatically documents the results in the form of individually customizable test statistics.
The test diameter on the IPS B100 is 68 to 110mm, while the bore depth is unlimited.
Designs of the IPS B100
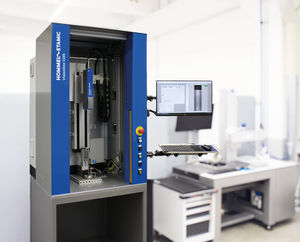
Offline system integration with manual loading
The manual loading systems are ideal for inspections of small series and prototypes. These flexible systems allow users to inspect a range of engine block types efficiently and cost-effectively.
• For inline engines with motorized X-axis (manual also available)
• For inline engines and Vengines. The inspection sequence is fully automatic.
Catalogs
No catalogs are available for this product.
See all of JENOPTIK Industrial Metrology Germany GmbH‘s catalogsOther JENOPTIK Industrial Metrology Germany GmbH products
Optical Surface Inspection
*Prices are pre-tax. They exclude delivery charges and customs duties and do not include additional charges for installation or activation options. Prices are indicative only and may vary by country, with changes to the cost of raw materials and exchange rates.


