- Metrology - Laboratory
- Metrology and Test Equipment
- Optical profilometer
- LiveStrong Optoelectronics Company

- Products
- Catalogs
- News & Trends
- Exhibitions
Optical profiler 3Droughnessindustrial
Add to favorites
Compare this product
Characteristics
- Technology
- optical, 3D
- Function
- roughness
- Domain
- industrial
- Other characteristics
- non-contact
Description
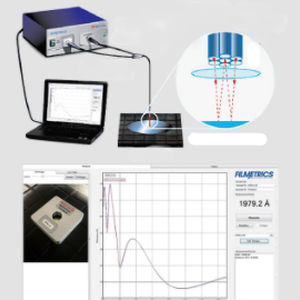
Get an optical profilometer for less than half the price of an AFM or 3D stylus profilometer. The Profilm30 uses state-of-the-art white light interferometry (WLI) to measure surface profiles and roughness down to 0.05ym; adding the PSI option takes the minimum vertical feature size down to 0.001pm. Profilm software can analysis full image, including surface texture(roughness) even on curved surface and step-height. For larger image, the software also can stitch multiple images together.
Feature
- Automated XY stage with 100mm x 100mm of motion and tip-tilt with +1-5° of range
- Automated Z-motion with 100mm of range
- Industryteading 500ym of piezo travel
- Industry-leading 2mm-wide field-of-view with 10x objective. Also it can configure with four-position turret for other applications that multitiple magnification objective are used alternately
- 265mm maximum sample width
- Include 10um step-height standard with 0.5% accuracy. Other 100um, 2um and 4um are available
Texture(Roughness) Analysis
For curved and texture (roughness) surface, the software has removal (aka form removal) and filtering functions.
By line and area, with all 47 standard ASME/EUR/ISO roughness parameters can be supported.
1. The Alpha step is a destructive measurement and our system uses an optical non-contact method
2. Can measure samples with curvature and other uneven surfaces
3. For the same measurement time, such as a few seconds, this system can mea sure an area of several square millimeters, but the Alpha step can only perform one-dimensional linear scanning
4. Measurable better aspect ratio
Other LiveStrong Optoelectronics Company products
Material and Thin Film Surface Characterization
Related Searches
- Test machine
- Measuring machine
- Automatic test machine
- Thickness measuring machine
- Industrial testing system
- Optical measuring machine
- Automatic measuring machine
- Laser scanning system
- Measurement scanning system
- 3D scanning system
- Resistance test machine
- Control measuring machine
- Laser measurement system
- Digital display thickness gauge
- Surface measuring machine
- High-resolution scanning system
- 3D measuring machine
- Industrial profiler
- Calibration measuring machine
- Angle measuring machine
*Prices are pre-tax. They exclude delivery charges and customs duties and do not include additional charges for installation or activation options. Prices are indicative only and may vary by country, with changes to the cost of raw materials and exchange rates.

