- Industrial machines and equipment
- Printing, Marking and Engraving
- Dot peen marking machine
- Pryor Marking Technology

- Products
- Catalogs
- News & Trends
- Exhibitions
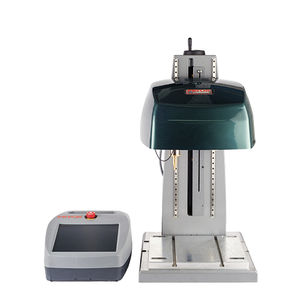
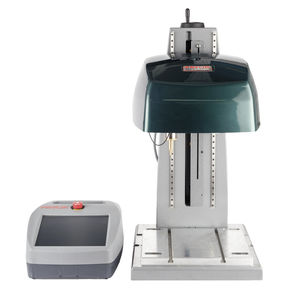
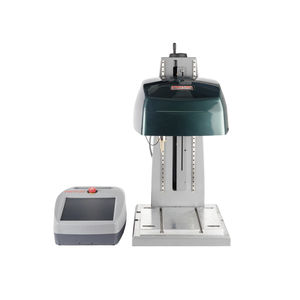
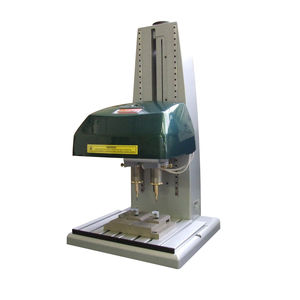
Dot peen marking machine Type A Marking and Verification Stationmetalaluminumbenchtop

Add to favorites
Compare this product
Characteristics
- Technique
- dot peen
- Material
- metal, aluminum
- Configuration
- benchtop
- Applications
- data matrix, for flat and cylindrical objects
- Other characteristics
- programmable, traceability, computer-controlled, vision system, 2D data matrix, with identification
- X travel
Max.: 300 mm
(11.81 in)Min.: 100 mm
(3.94 in)100 mm, 150 mm, 300 mm
(3.94 in, 5.91 in, 11.81 in)- Y travel
Max.: 150 mm
(5.91 in)Min.: 100 mm
(3.94 in)100 mm, 150 mm
(3.94 in, 5.91 in)
Description
Pryor’s Marking and Verification Station is an all-in-one system for identifying components, verifying marks and data capture using machine vision. This system is ideal when identifying components with marks that must adhere to tight tolerances, as the mark quality is easily checked using the verification system installed in the machine. For this reason, it is widely used to create Data Matrix codes in the aerospace industry.
Pryor's unique autosense feature positions the marking stylus marks at the optimal distance from the component, ensuring consistent depth of mark for every cycle
Verification camera ensures that quality escapes are captured before they leave the station
Reduced operator error by simple set up of pre-loaded layouts
Can be set to match the requirements of many international part marking standards
Wide range of compatible accessories available to secure your work piece to the machine for wobble, and thus quality escape, prevention
Range of marking window sizes available for optimal marking of different sized layouts
Machine Construction: Cast aluminium column and base, metal internal components
Machine Weight: 40kg
Operating Temperature: 0°C – 80°C (32°F – 176°F)
Electrical Supply: 240V 50Hz / 110V 60Hz
Workpiece Hardness: Max. 62 HRC (800HV)
Dimensions:
Marking Window Area - 300mm x 150mm
Machine Head Cover - 515mm (W) x 419mm (D)
Verification Area - 314mm (W) x 160mm (D)
Marking and Verification Area - 253mm (W) x 150mm (D)
Overall system dimensions - 1723mm (H) x 1420mm (L) x 620mm (D)
Work top height from ground - Approximately 955mm
VIDEO
Catalogs
No catalogs are available for this product.
See all of Pryor Marking Technology‘s catalogsRelated Searches
- Marking machine
- Laser marking workstation
- Metal marking workstation
- Benchtop marking workstation
- Plastic marking workstation
- Industrial marking workstation
- Automated marking machine
- Compact marking workstation
- High-speed marking machine
- Laser engraving system
- Aluminum marking workstation
- Dot peen marking machine
- Integration marking machine
- Air-cooled marking machine
- Hand-held marking machine
- Pneumatic marking machine
- Industrial engraving system
- Marking and engraving system
- Laser marking and engraving system
- Plastic engraving machine
*Prices are pre-tax. They exclude delivery charges and customs duties and do not include additional charges for installation or activation options. Prices are indicative only and may vary by country, with changes to the cost of raw materials and exchange rates.


