
- Products
- Catalogs
- News & Trends
- Exhibitions
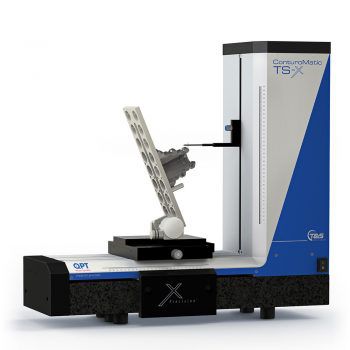
Contour measuring machine TS-Xroughnessautomatichigh-precision
Add to favorites
Compare this product
Characteristics
- Measured physical value
- contour, roughness
- Operating mode
- automatic
- Other characteristics
- high-precision, rugged
Description
Our proven concept: Creating “contour- and roughness-measurements of the highest level” is the constant motivation behind the further development of our systems. Under the motto: “‘Better’ is the enemy of ‘Good'” we have once again reviewed with a critical eye all those elements of the ConturoMatic TS which are crucial for the accuracy of the system. The meticulous fine-tuning of the guides, of the aerostatic air-lubricated bearings, fast data transfer, high-speed axis control, an optimised probe arm mount, re-developed drive units, as well as incremental measuring systems of the highest quality, are the results of a comprehensive process of further development.
At the end of which stands the latest achievement:
The ConturoMatic TS-X – our most powerful measuring station.
Friction-free, aerostatic special air-lubricated bearings in the X and Z axes
Extended measuring range X/Z (280 x 350 mm)
Hybrid ceramic probe-arm mount
Static probing and measurement data recording in the X direction
Module for roughness-testing within the standard scope of delivery
Table load capacity 25 kg (optionally up to 50 kg).
Y-table adjustable manually and by motor
Contactless, incremental measuring systems based on steel.
Measuring system resolution 1 Nm
Superior price:performance ratio
Error limit: ± (0.85 + L/100) μm [L = measurement range in mm] (without change of probe direction)
Combined contour- and roughness-measurement possible over the entire measuring range
Software basis of ConturoMatic: W10/64Bit, optionally W7/64Bit
Related Searches
- Measuring device
- Measuring machine
- Portable measuring device
- Automatic measuring machine
- High-precision measuring machine
- Touch probe head
- Parts measuring machine
- Automatic measuring device
- Compact measuring device
- Measurement touch probe head
- Geometry measuring device
- Contour measuring machine
- Rugged measuring machine
- Standard
- Roughness measuring machine
- Horizontal measuring machine
- Measuring device with integrated screen
- Large part measuring machine
- Shape measuring device
- Position measuring device
*Prices are pre-tax. They exclude delivery charges and customs duties and do not include additional charges for installation or activation options. Prices are indicative only and may vary by country, with changes to the cost of raw materials and exchange rates.


