- Products
- Catalogs
- News & Trends
- Exhibitions
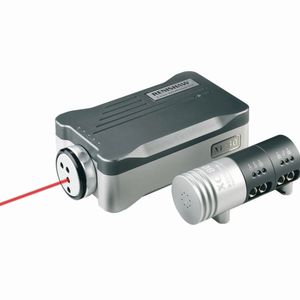
Laser alignment system XK10for machine toolswirelessgeometric

Add to favorites
Compare this product
Characteristics
- Technology
- laser
- Applications
- for machine tools
- Other characteristics
- wireless, geometric
Description
Measure and align geometric and rotational axes on machine tools
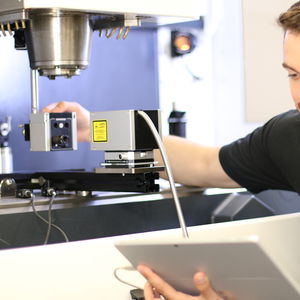
The XK10 alignment laser system has been developed to measure geometric and rotational errors of machines tools. Used with the XK10 machine tool fixturing kit, it enables faster and easier measurements over traditional methods, such as dial gauges, autocollimators and metrology artefacts. It can be used on linear rails to ensure that they are straight, square, flat and level, as well as to assess spindle direction and coaxiality of rotary machines.
Measuring geometric and rotational errors during machine build, maintenance and service, enables accurate alignment and adjustment of machine axes to achieve optimum performance. This reduces time during machine assembly processes and on-site service, including regular maintenance or following a collision.
The XK10 can be used to measure and record a range of geometric error types using a single system. Live error readings allow adjustments to be made to the machine during the alignment process.
System overview:
The launch is the primary method of laser transmission for the majority of measurement types. It is used with the M unit for geometric measurements up to 30 m.
The S unit and M unit contain both transmitters and receivers and can be set up in different configurations depending on the error type under test.
The display unit is used to take and record measurements, as well as display live readings allowing for easy adjustment. Powered by a rechargeable battery, it allows portable operation up to 30 hours.
VIDEO
Catalogs
Related Searches
- Measuring machine
- Optical measuring machine
- High-precision measuring machine
- RENISHAW touch probe
- Parts measuring machine
- Distance measuring machine
- Control measuring machine
- RENISHAW measurement touch probe
- Laser measurement system
- Diameter measuring machine
- Compact measuring machine
- Length measuring machine
- CNC measuring machine
- High-speed measuring machine
- Alignment system
- RENISHAW compact touch probe
- Temperature measurement system
- Gauge measuring machine
- Laser alignment system
- Linear measurement touch probe
*Prices are pre-tax. They exclude delivery charges and customs duties and do not include additional charges for installation or activation options. Prices are indicative only and may vary by country, with changes to the cost of raw materials and exchange rates.


