- Metrology - Laboratory
- Analytical Instrumentation
- Monitoring analyzer
- SITA Messtechnik
Monitoring analyzer FluoScan 3Dlaboratoryfluorescencefor integration
Add to favorites
Compare this product
Characteristics
- Application domain
- monitoring, laboratory
- Measured value
- fluorescence
- Configuration
- for integration
- Mode of use
- automatic
Description
Automated cleanliness inspection with proven fluorescence sensor technology
AUTOMATED
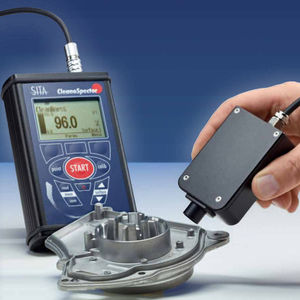
Cleanliness inspection of three-dimensional parts' surfaces
QUICK
Surface scan of different parts detecting residual organic contamination within a very short time
RELIABLE
Robust Sensor
Reproducible measuring results
Flexible at the process and in the laboratory
Automated inspection of die cast aluminium before bonding
In manufacturing processes of cast parts release agents are used. In follow-up processes such as the bonding of sealing grooves, release agent residues lead to insufficient adhesion of the bonding joint.
By inspecting the cleanliness of a sealing groove via fluorescence measurement, the quality of the bonding joint is ensured.
-
Inspection of printed circuit boards
To meet the high quality requirements of bonding and soldering processes, pads have to be free of organic contamination. By scanning the pads cleanliness can be controlled and high quality standards are ensured.
Defects can be identified at an early time and thus, rejects and costly system failures can be prevented.
Measuring principle
The measuring method uses the characteristic of organic substances to fluoresce. UV light is focused and radiated onto the surface. The contamination fluoresces. The intensity of the fluores-cence increases with the layer thickness of the contamination. The intensity is measured in RFU: Relative Fluorescence Unit.
The lower the measuring values in RFU, the cleaner the surface.
Catalogs
SITA FluoScan 3D
2 Pages
Other SITA Messtechnik products
Fluorescence Measuring and Testing Devices
*Prices are pre-tax. They exclude delivery charges and customs duties and do not include additional charges for installation or activation options. Prices are indicative only and may vary by country, with changes to the cost of raw materials and exchange rates.


