- Metrology - Laboratory
- Metrology and Test Equipment
- CT computed tomography machine
- ZEISS Métrologie et Microscopie Industrielle
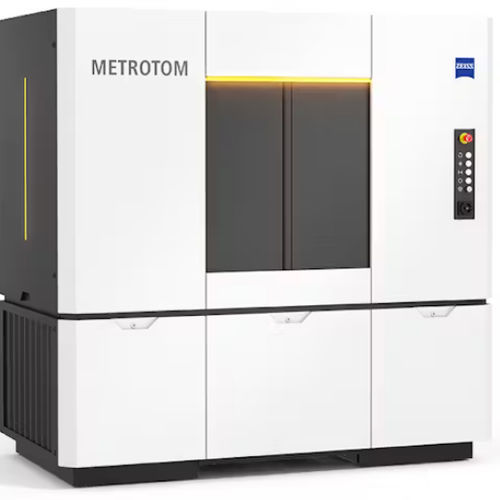
X-ray computed tomography system ZEISS METROTOM 6 ScoutCT3D
Add to favorites
Compare this product
Characteristics
- Options
- X-ray, CT, 3D
Description
ZEISS METROTOM 6 scout (GOM CT) digitizes complex parts including the internal geometries at the finest level of detail. You get a complete 3D image for GD&T analyses or nominal-actual comparisons. The metrology CT particularly excels in digitizing small plastic parts.
How you benefit:
Extremely high resolution
High precision
due to mathematical modeling of the measuring room
Automatic object positioning
via 5-axis kinematics and live view in the software
All-in-one software
for a consistent, fast workflow
Reveals what remains hidden with other systems
Resolution
When digitizing a part, ZEISS METROTOM 6 scout (GOM CT) achieves an outstanding sharpness of detail: On the one hand, because it uses a high-resolution 3k X-ray detector for acquiring measuring data and on the other hand, because each part is measured in the best possible measurement position and thus always in the highest possible resolution. You can see the result below: on the left, measuring data generated with ZEISS METROTOM 6 scout (GOM CT) and on the right the usual standard.
Guarantees high precision
For producing its precise 3D measuring data, ZEISS METROTOM 6 scout (GOM CT) applies mathematical intelligence: It combines perfectly interconnected algorithms throughout the measuring sequence with digital modeling of the measuring room. Additionally, the system features optimized mechanical stability of all components that are relevant for performing the measurement. The bottom line: Based on the measuring results, you can evaluate a part’s quality in a truly reliable, highly precise way and conduct further analysis.
Catalogs
No catalogs are available for this product.
See all of ZEISS Métrologie et Microscopie Industrielle‘s catalogsOther ZEISS Métrologie et Microscopie Industrielle products
Industrial CT- and X-Ray Solutions
Related Searches
- Carl Zeiss measuring system
- Optical measuring machine
- Automatic measuring machine
- Measurement scanning system
- 3D scanning system
- High-precision measuring machine
- Measuring system for industrial applications
- Carl Zeiss parts measuring system
- Control measuring machine
- Carl Zeiss coordinate measuring machine
- Video measuring machine
- Inspection scanning system
- High-speed scanning system
- High-precision scanning system
- Compact scanning system
- Dimensional measuring machine
- Carl Zeiss 3D measuring system
- Multi-sensor coordinate measuring machine
- Carl Zeiss bridge coordinate measuring machine
- High-speed measuring machine
*Prices are pre-tax. They exclude delivery charges and customs duties and do not include additional charges for installation or activation options. Prices are indicative only and may vary by country, with changes to the cost of raw materials and exchange rates.


